Rear brake pads & discs, Altea/Leon Mk2

Viking

Insurance co's are crap.
May 19, 2007
2,317
4
Near Richmond, North Yorks
I replaced the pads & discs on my Altea this morning, so took some photos while doing it. Here's the process from start to finish. The setup will no doubt be the same as the Golf-Jetta Mk5.

First up, the news pads & discs. I priced them from the local motor factors at just over £52 for some anonymous Chinese stuff, then a price from Euro Car Parts online for ATE brand at £77 delivered. Then I went to Trade Parts Specialist (TPS) and got genuine VAG parts for a shade under £70.00 (a good move in my opinion, and I'll tell you why later). TPS are VAGs own parts network so they're spot on for part numbers and prices.

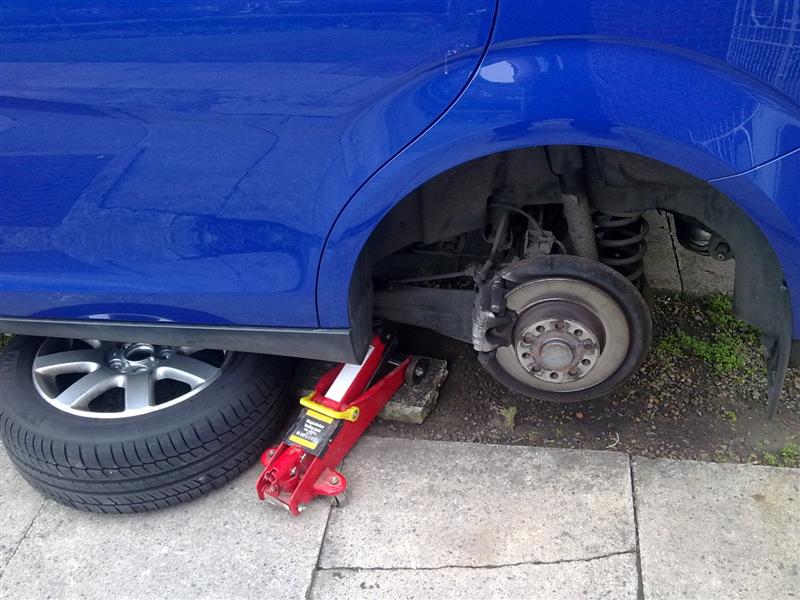
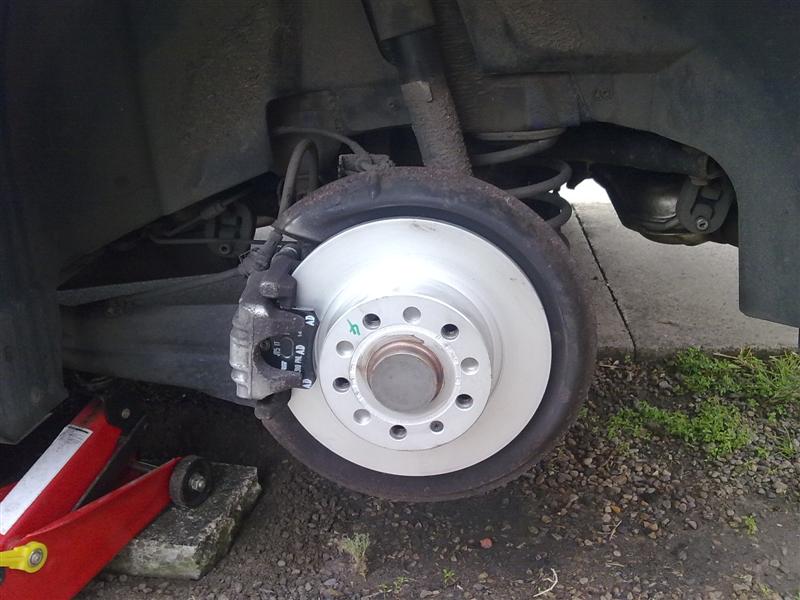
So, first up, jack the car and remove the rear wheel. If you need help with this part then stop reading now and take your car to a garage. Someone else borrowed my axle stands and good jack last week so I'm using my small jack and an improvised axle stand.
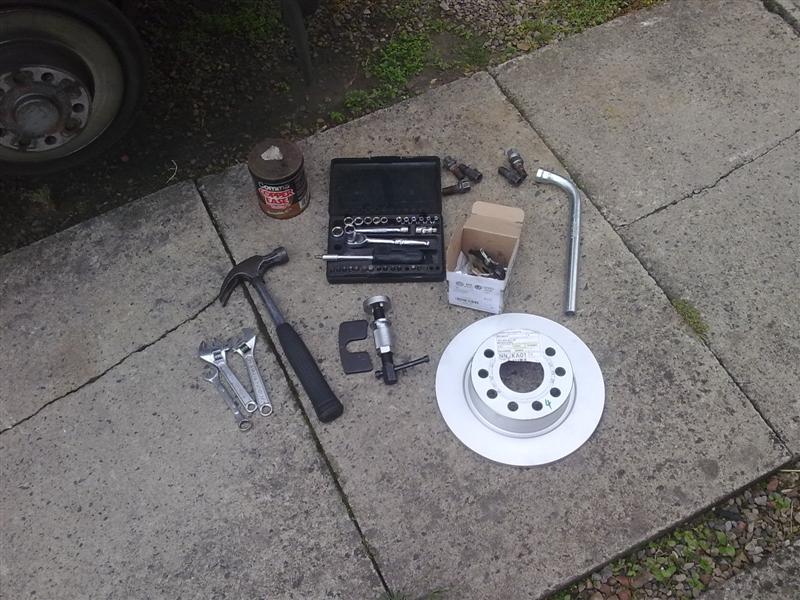
brakes-1.jpg


The basics...

brakes-2.jpg


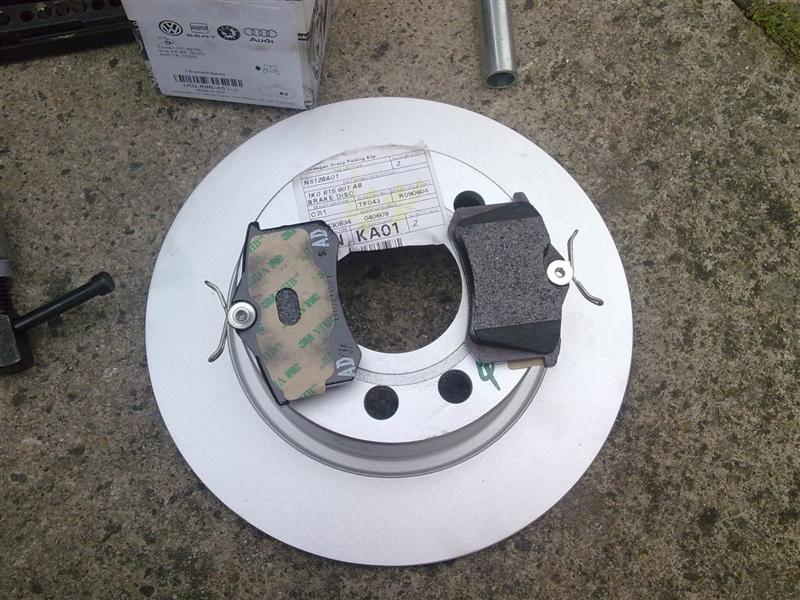
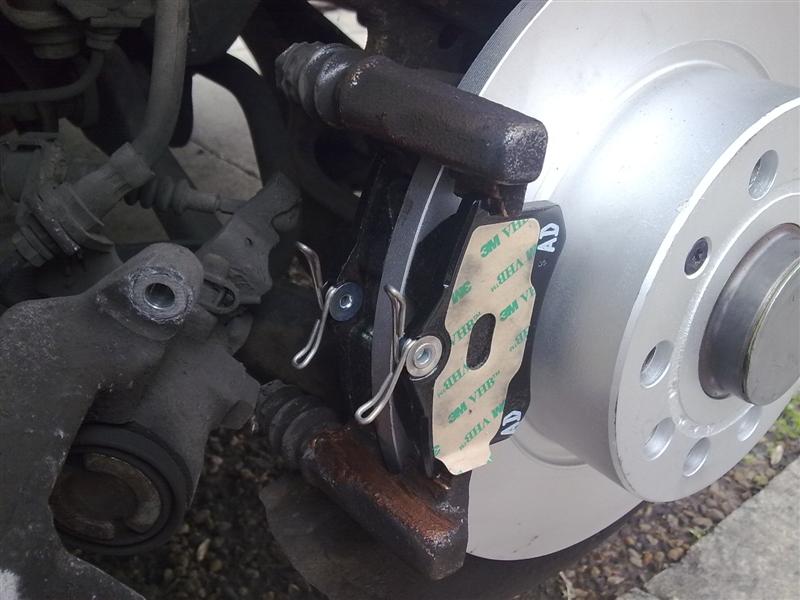
The new pads & disc...

brakes-3.jpg


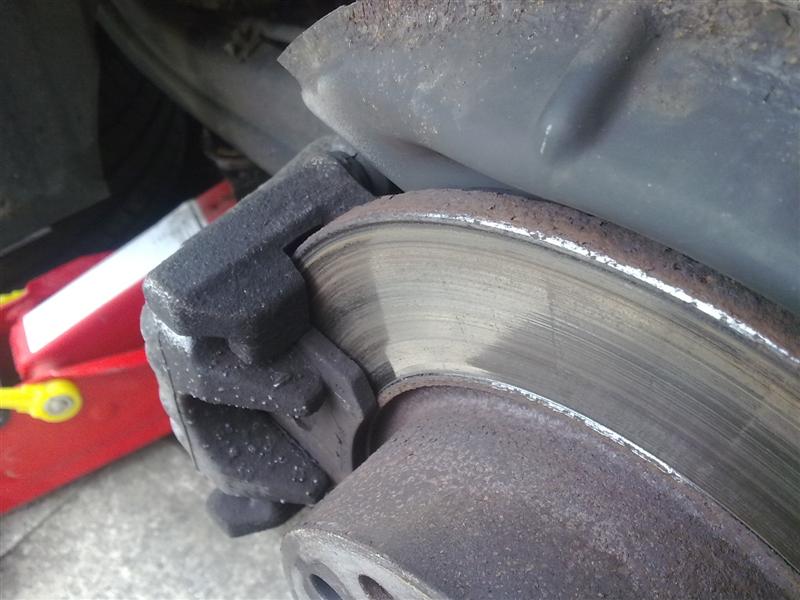
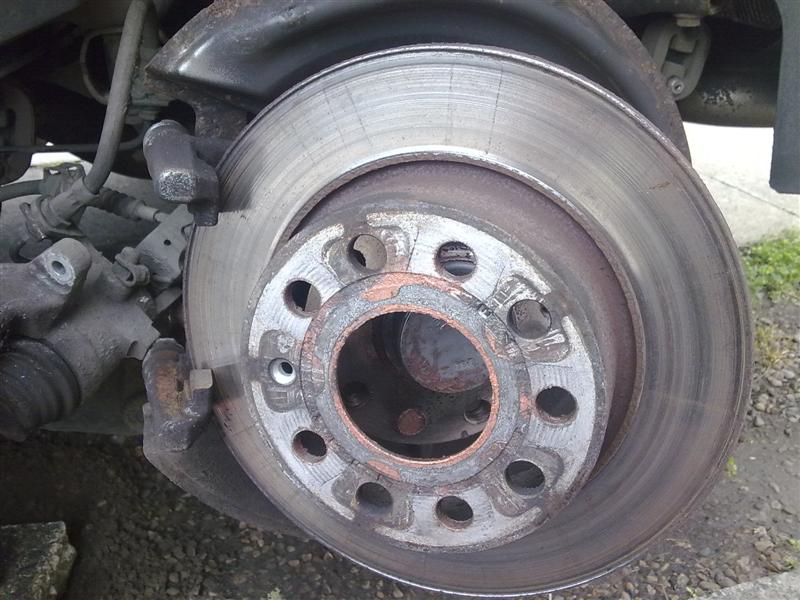
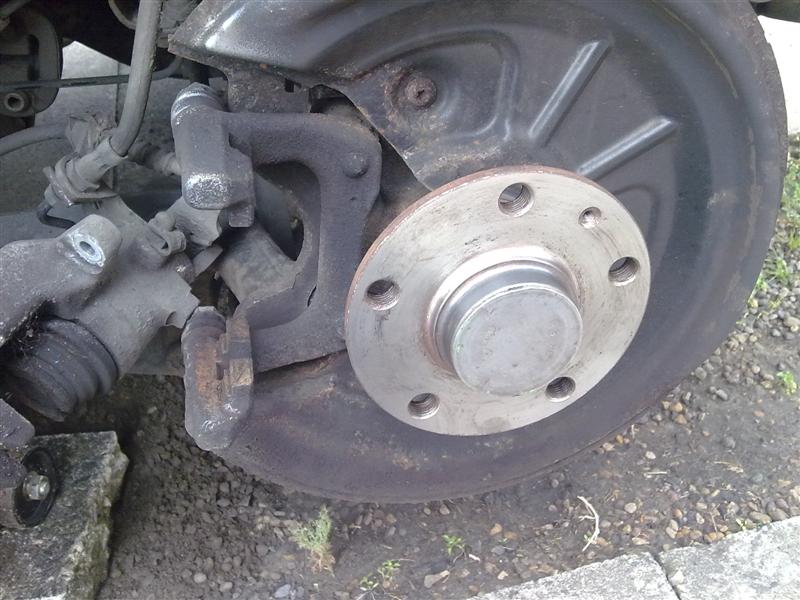
And the old ones. These are just about as far as I dare go, but still 20k miles since the dealers told me they were shot and needed replacing.

brakes-4.jpg


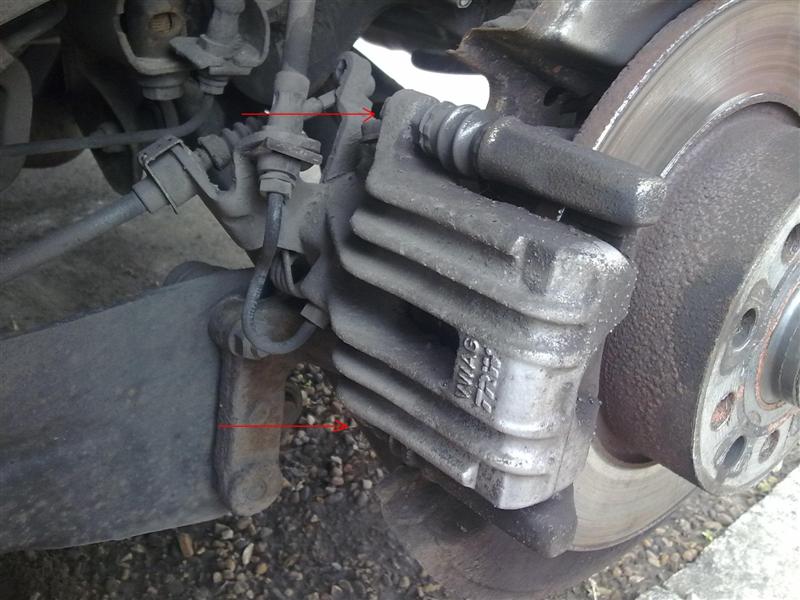
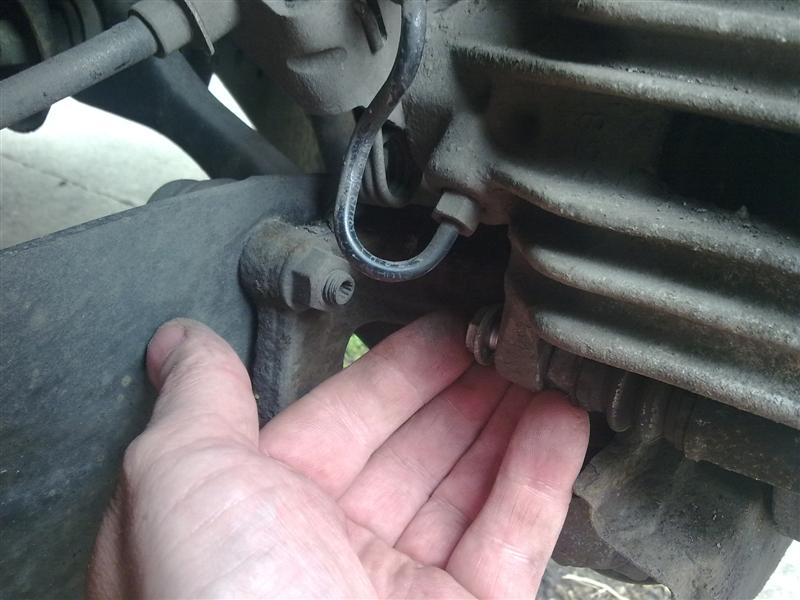
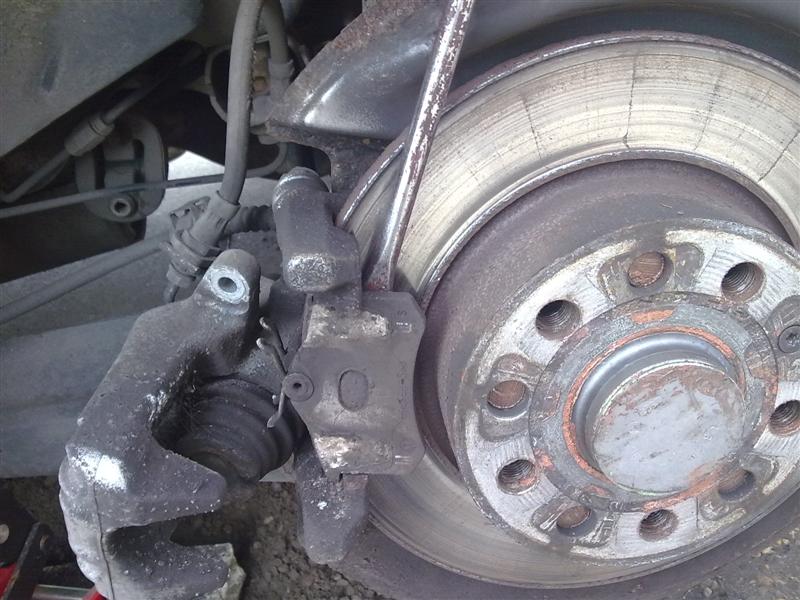
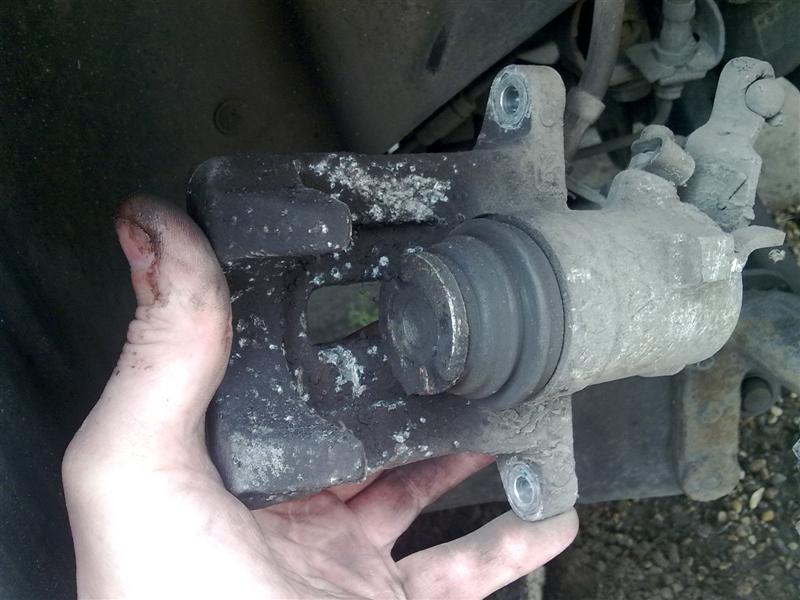
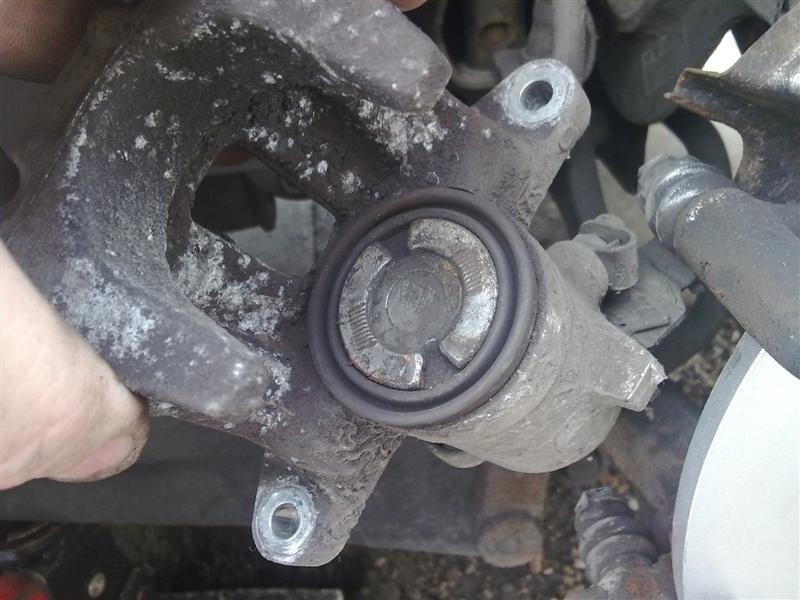
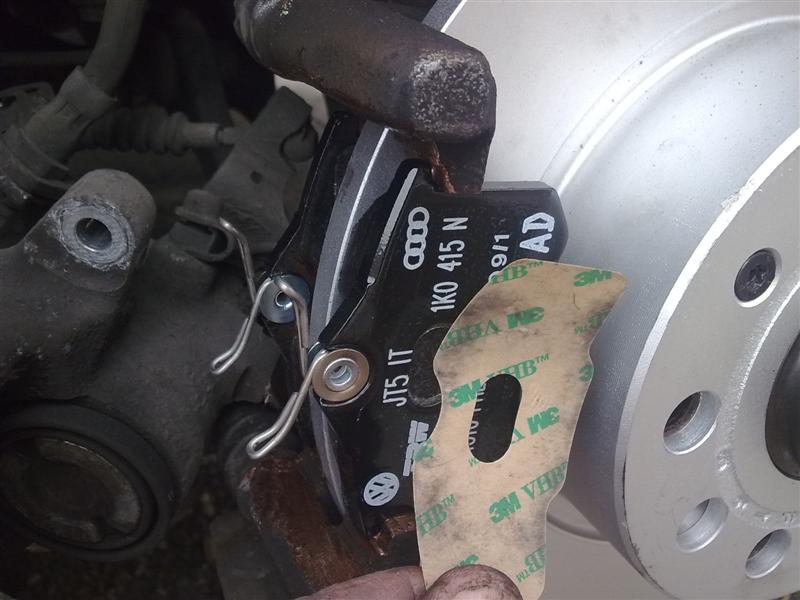
The caliper, and a couple of arrows pointing to the 2 bolts you need to undo.

brakes-5.jpg


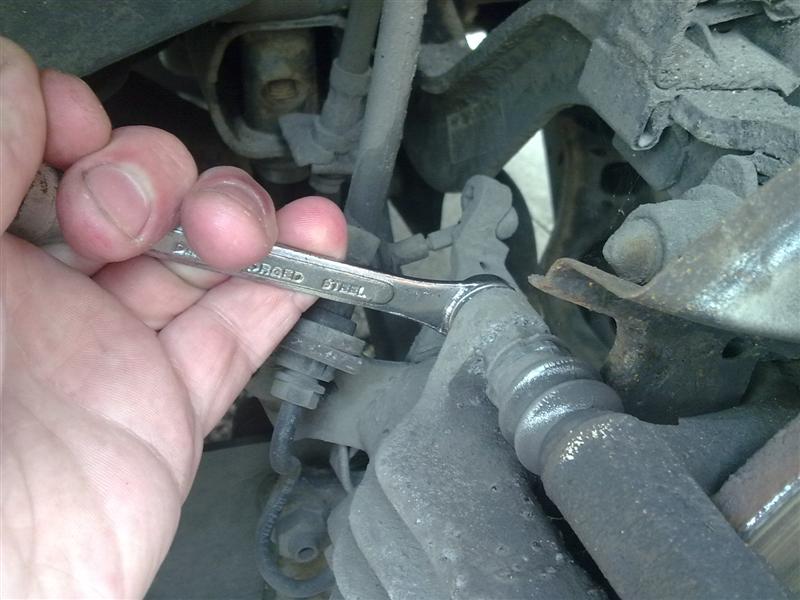
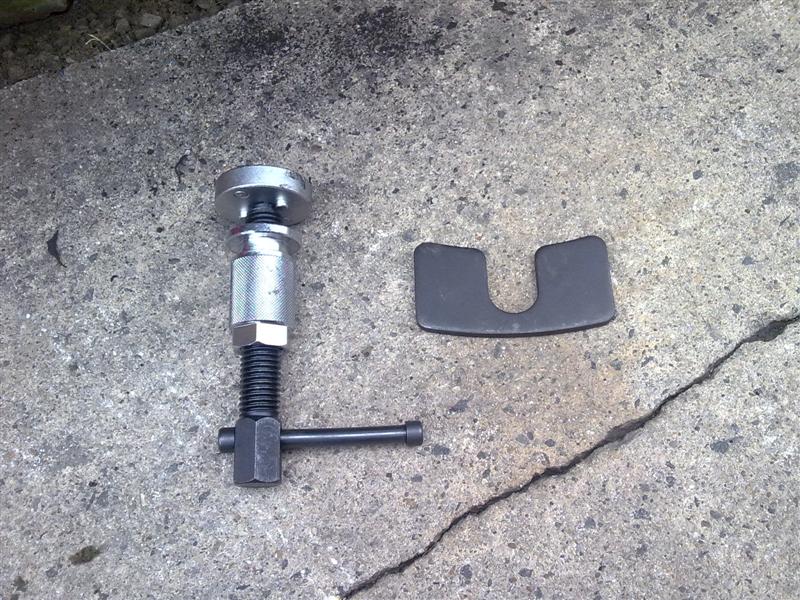
You need a 13mm spanner to undo the carrier bolts, and they're tight. I used an old spanner and tapped it with a hammer to loosen. Standard thread so they just come off the same way as any old bolt.

brakes-6.jpg


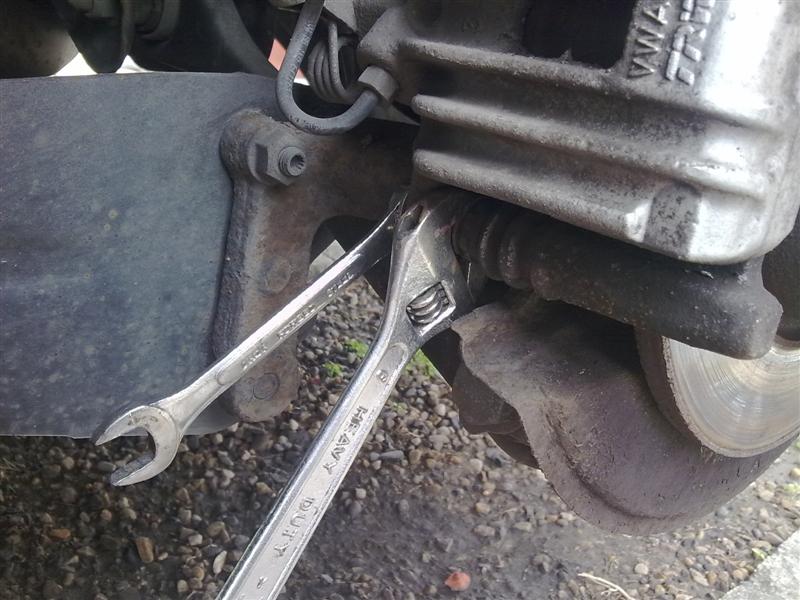
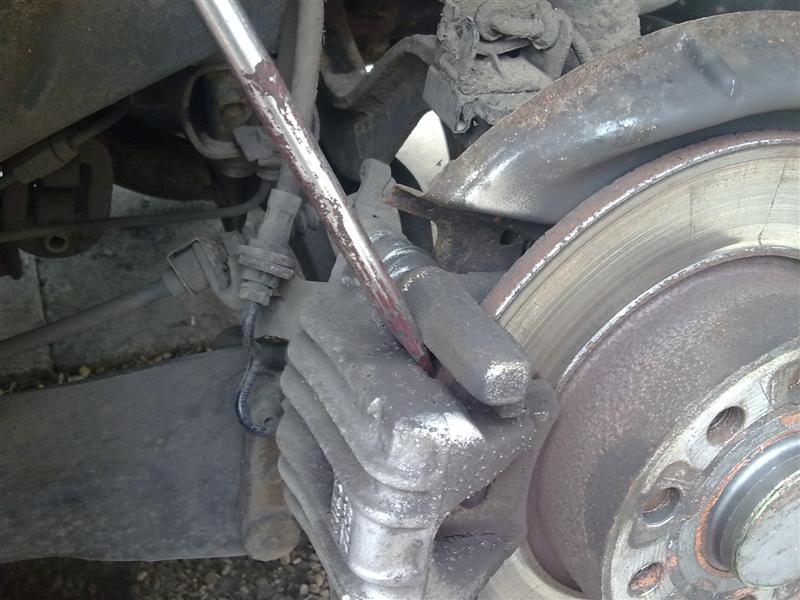
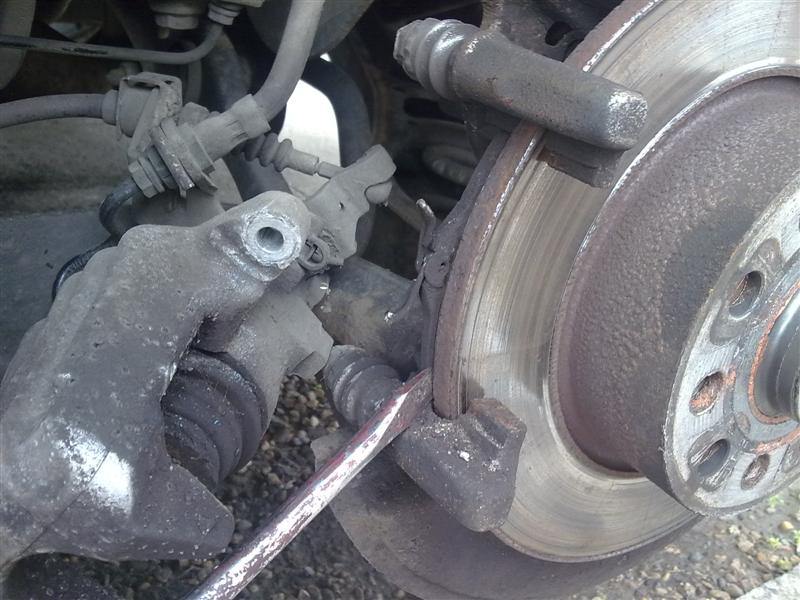
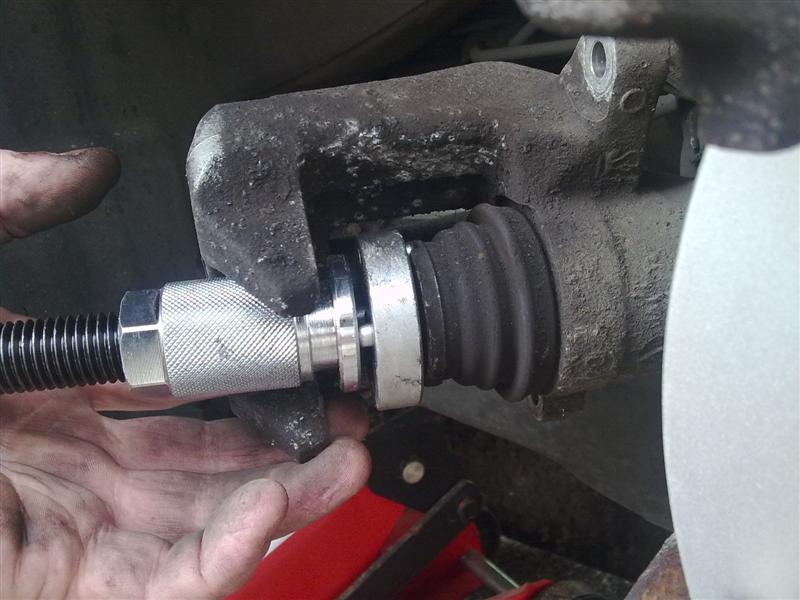
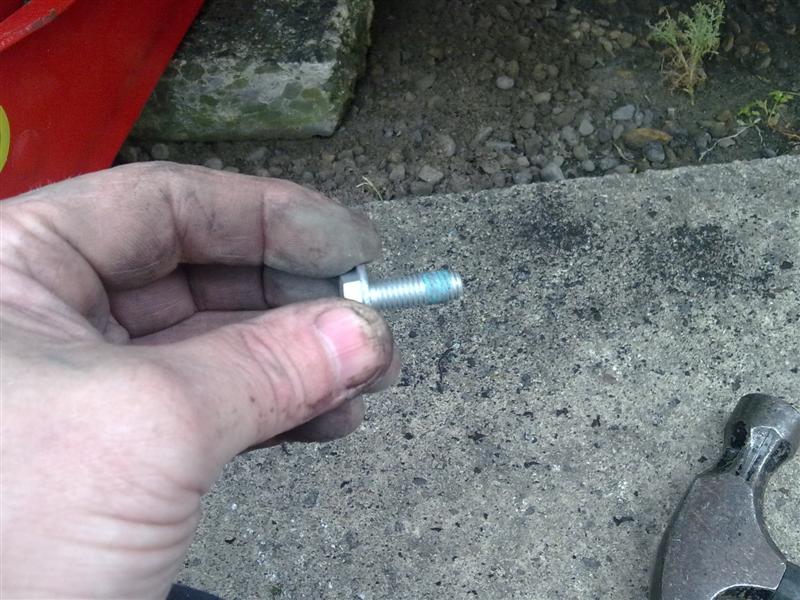
Then when you've got it shifted you need a second spanner (14mm this time)* as shown to hold the guide pin and stop it turning. I've lost my 14mm, so had to use a rough arsed adjustable.

*Might even be a 15mm

brakes-7.jpg


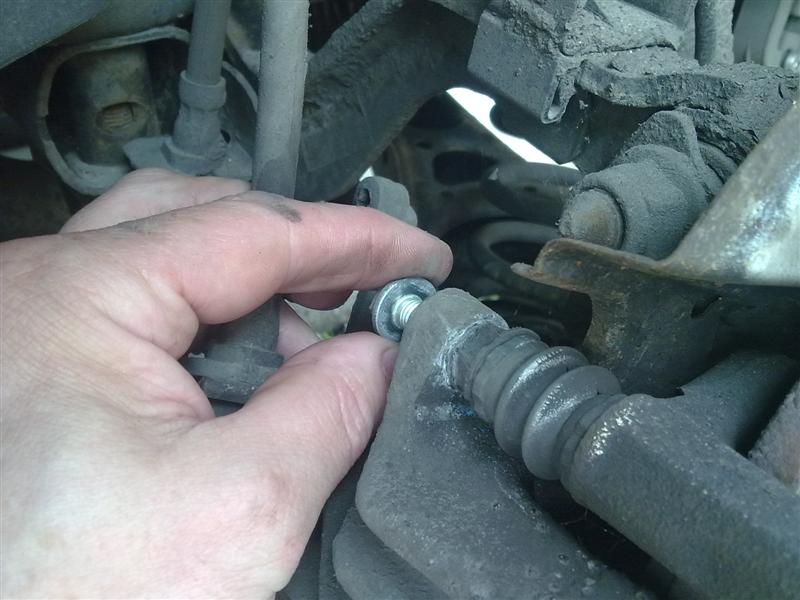
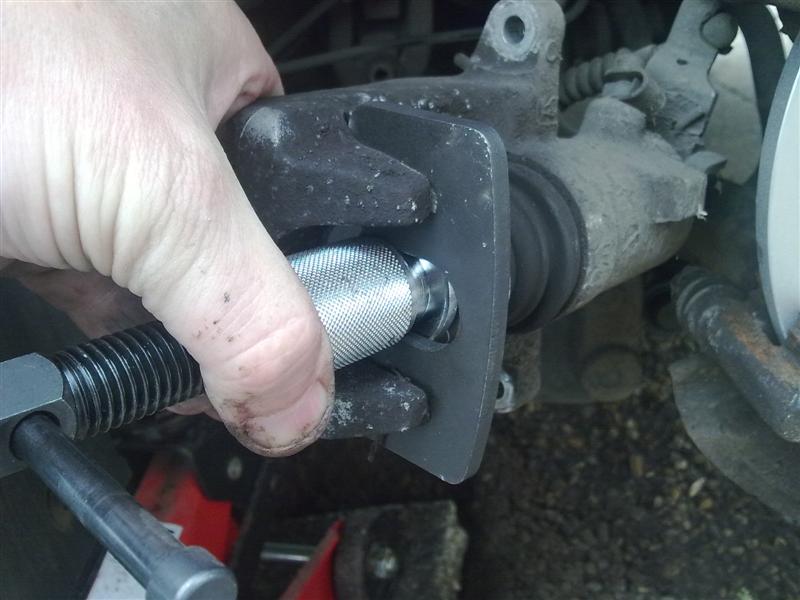
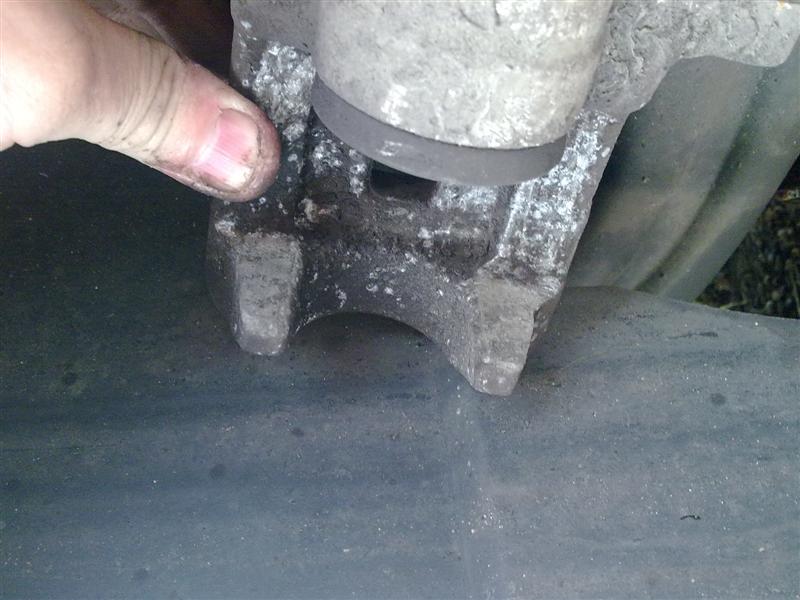
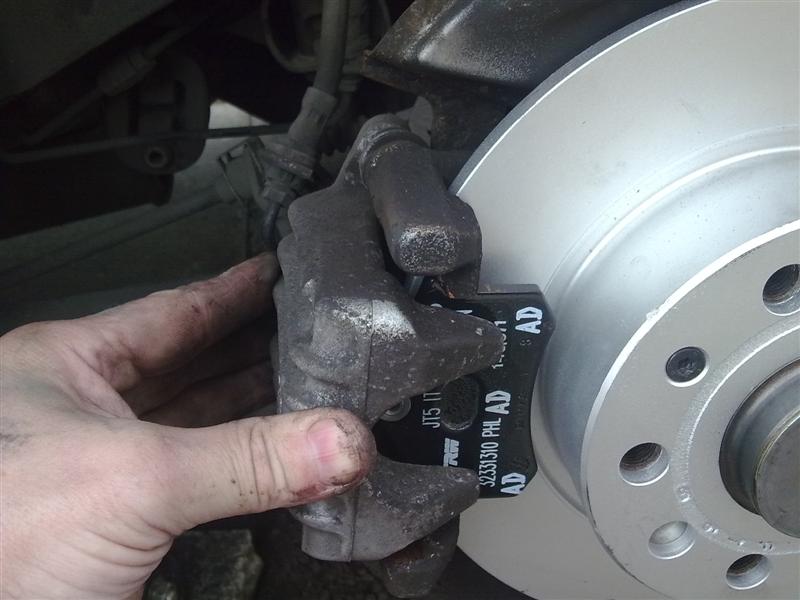
Once you've got it loosened, the bolt pulls out.

brakes-8.jpg


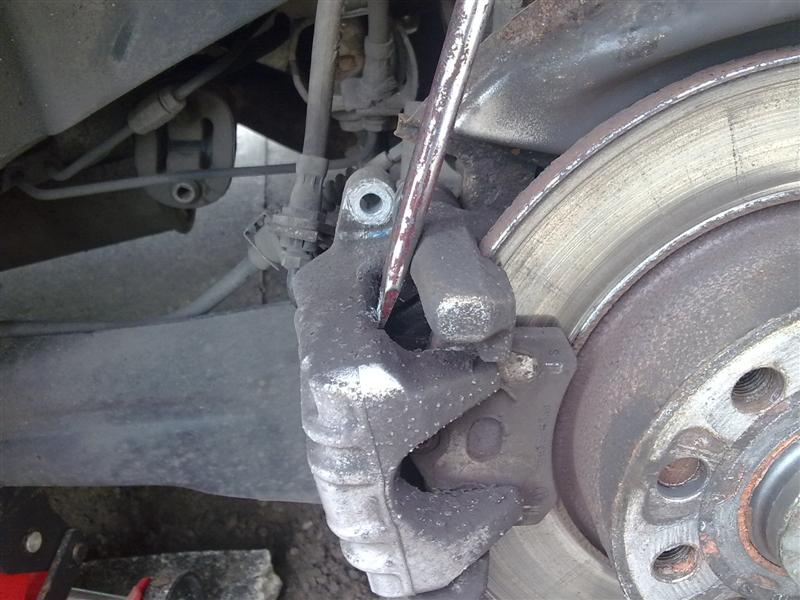
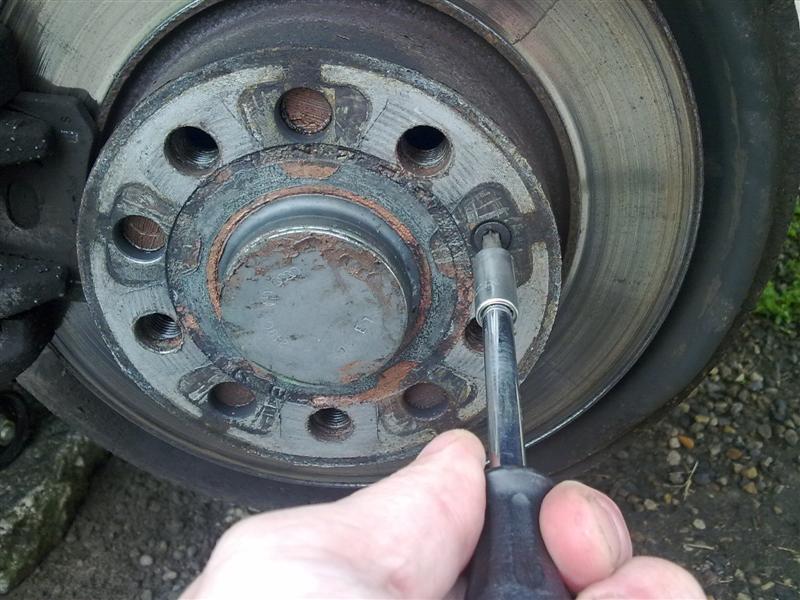
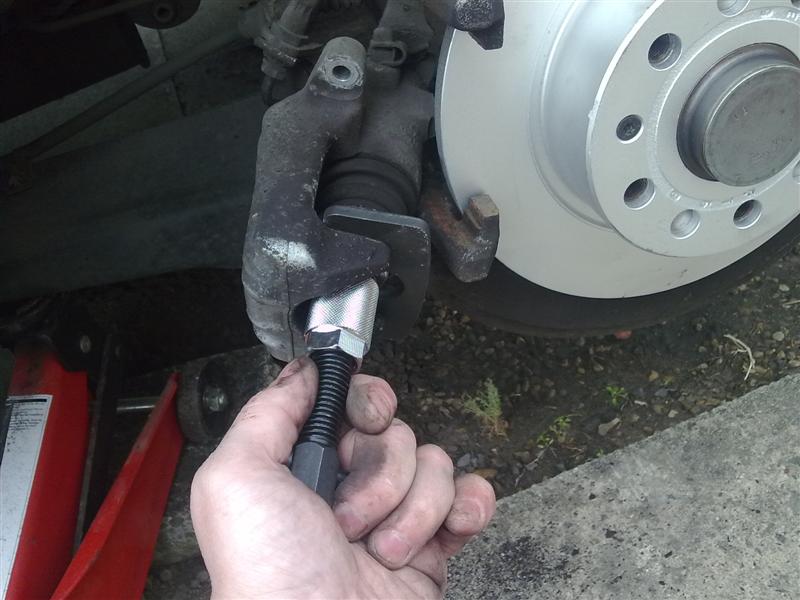
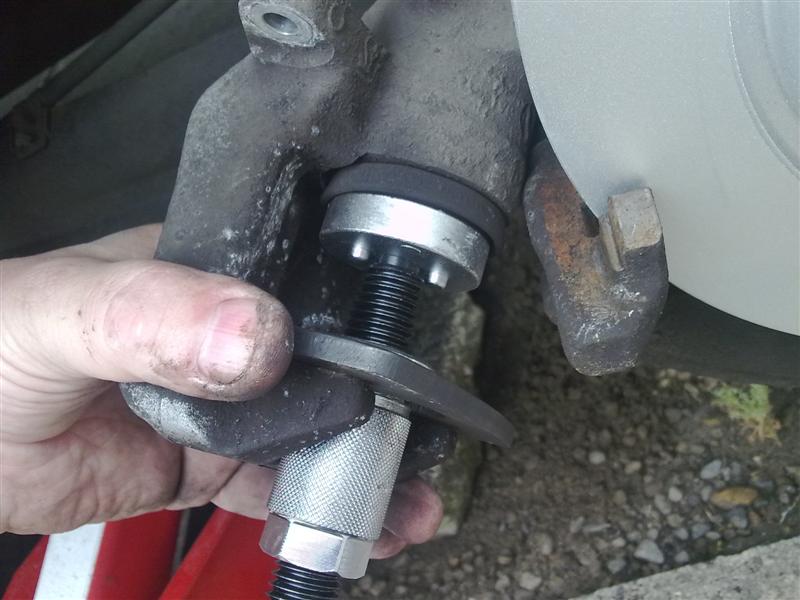
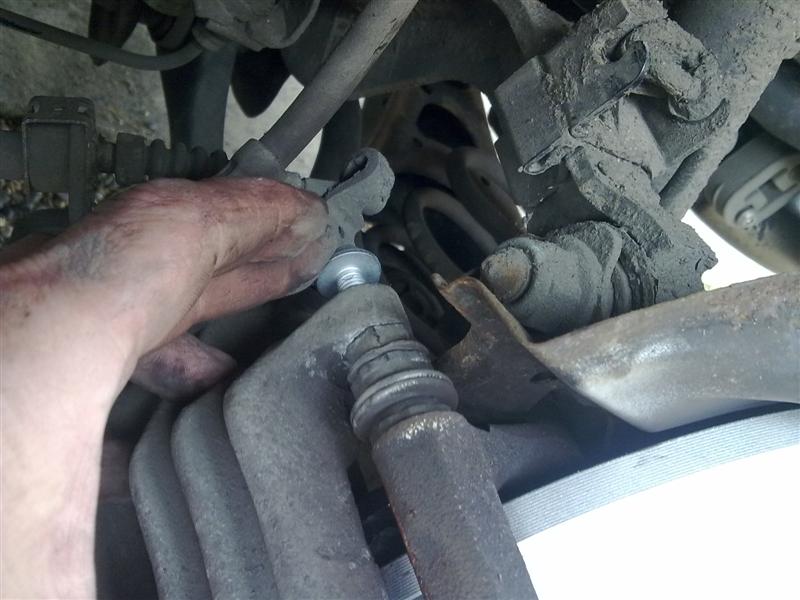
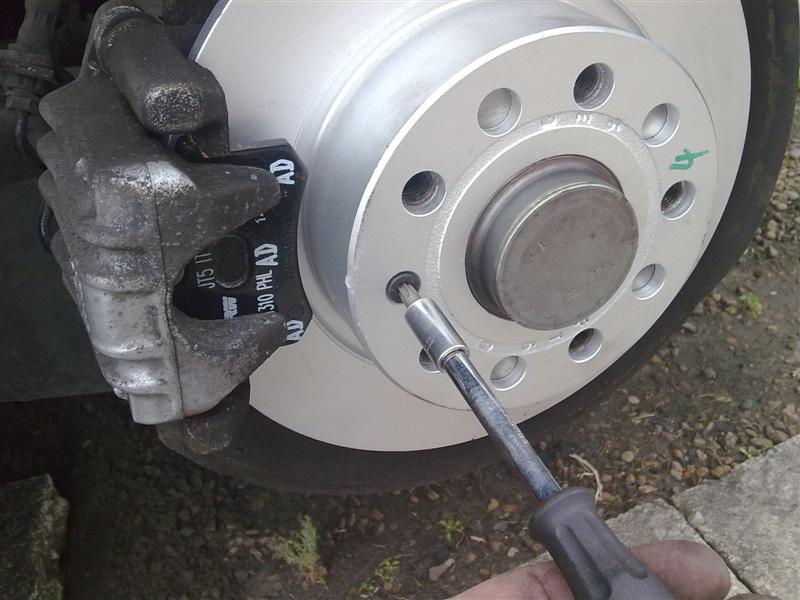
Then the same procedure on the bottom carrier bolt. Again, tapping the spanner to loosen it.

brakes-9.jpg


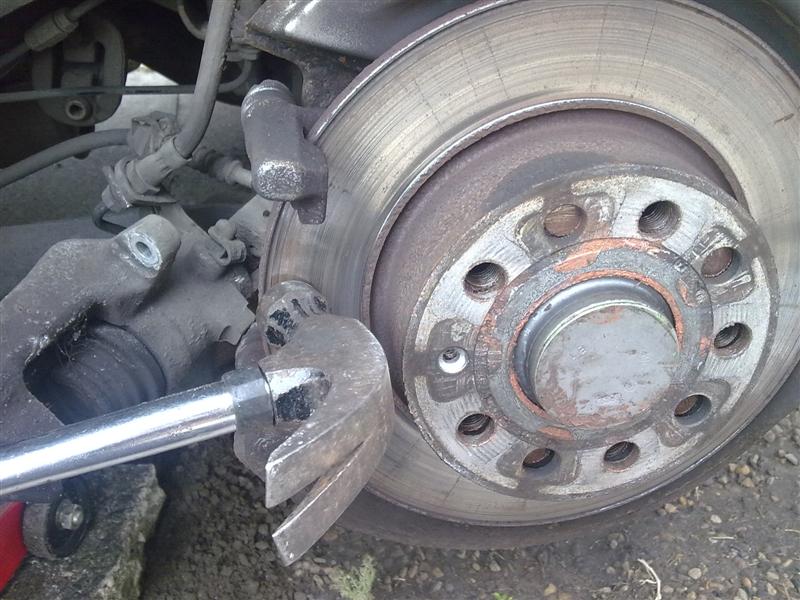
Then the second spanner to hold the guide pin again.

brakes-10.jpg


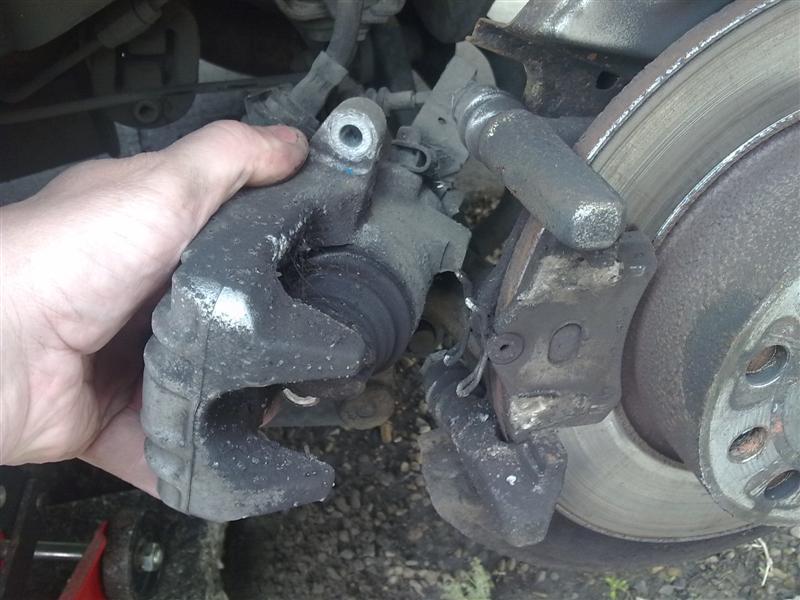
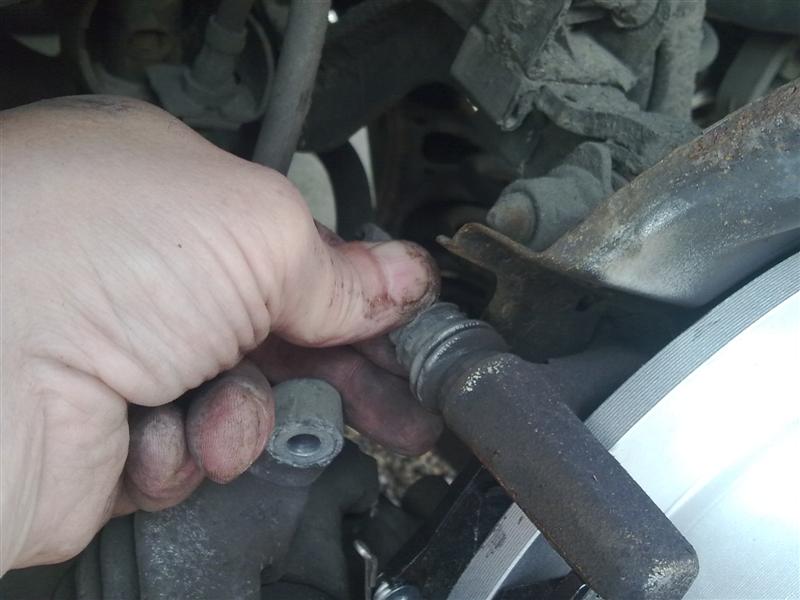
Reached the image maximum, so next post will continue from here.
 
Last edited:
  • Like
Reactions: seatcupra

Viking

Insurance co's are crap.
May 19, 2007
2,317
4
Near Richmond, North Yorks
And the bolt pulls out.

brakes-11.jpg


Then a large screwdriver to lever the caliper away from the carrier and disc.

brakes-12.jpg


brakes-131.jpg


brakes-141.jpg


And there's the caliper free of the carrier.

brakes-15.jpg


Remove the old pads...

brakes-16.jpg


brakes-17.jpg


And remove the single Torx screw which locates the disc in position on the hub.

brakes-18.jpg


A sharp tap with a hammer was all mine needed to loosen the disc.

brakes-19.jpg


Then the disc can be removed by sliding it out past the carrier.

brakes-21.jpg


Continued...
 
Last edited by a moderator:

Viking

Insurance co's are crap.
May 19, 2007
2,317
4
Near Richmond, North Yorks
Clean any copper grease from the hub assembly, and scrape clean the area where the pads sit, so that the new ones fit nicely. Copper grease on the hub, and fit the new disc in place.

brakes-221.jpg


Now, on to the caliper. This is what you have, and the handbrake acts on the rear caliper so it's a little more complicated than a standard front caliper with no handbrake. But no problem.

brakes-23.jpg


All you need is one of these.

brakes-24.jpg


And it fits in here like this. Make sure you locate the two lugs on the faceplate into the two recesses in the piston face.

brakes-25.jpg


Then fit the plate as shown.

brakes-26.jpg


All you need to do now is wind the handle slowly to push the piston back into the caliper. There's been some confusion over the caliper/piston assembly, and whether or not the piston needs to be rotated or just pushed back into place. Well, it just pushes back in but the piston face turns as you do so. I suppose you could use a G clamp if you wanted to, but the correct tool locates into the piston face and as such makes sure that you don't force the piston off centre and damage the seals. For £21 from Halfords, the correct tool is a godsend in my opinion even if you only use it once in a blue moon. If you twist the piston using a home made tool then it'll cost you a lot more to repair than £21 to do the job properly.

Also you need to understand that you're pushing brake fluid back up the system. So you can either undo the bleed nipple and discharge the fluid to waste (into a bottle, not just onto the drive, eh?) or loosen the reservoir cap slightly and allow the fluid to return to the reservoir. Wind the handle slowly to allow the fluid to move without building up too much pressure.

brakes-27.jpg


There it is, nearly all the way back in.

brakes-28.jpg


Now, clean the face of the piston carefully to remove all the sticky gunk on there...

brakes-29.jpg


And also the other side where the second pad sits...

brakes-30.jpg
 
Last edited by a moderator:

Viking

Insurance co's are crap.
May 19, 2007
2,317
4
Near Richmond, North Yorks
Then make sure the guide pins are free to move in and out. Mine were okay.

brakes-31.jpg


Then a small smearing of copper grease onto the carrier where the pads sit. On the top edge aswell (can't see it in my pic).

brakes-32.jpg


And fit your new pads. They just slide into place.

brakes-33.jpg


Now, remember I said buying genuine pads was a good idea? Well, they come with an adhesive pad on them. Peel the paper off as shown...

brakes-34.jpg


and then refit the calipers.

brakes-35.jpg


With the genuine pads you get new carrier bolts, and they have a smear of locking compound on them, so no worries about them coming loose accidentally.

brakes-36.jpg


So, new bolt fitted and tightened. Then the same with the bottom carrier bolt. You'll need to press the caliper into position against the spring on the new pads. I didn't have enough hands for a photo.

brakes-37.jpg


Once that's all done, tighten the Torx screw to hold the disc in place if you didn't do it previously.

brakes-38.jpg


And that's about it. All done except for the refitting of the wheel etc.

brakes-last.jpg


Finally, remember that you'll need to pump the brake pedal to wind the calipers back into position before you go hooning around to see how they work. And they'll need a bit of bedding in aswell, so take it easy til they're settled.


Sorted.
 
Last edited:

Windy

Guest
Nice " How to " if I may say so.
When you had the slide pins out did you notice if the slide profiles were diferrent??
The reason I ask is I bought a set of golf calipers for my kit car and they were in bits. When I reassembled them I noticed the differing profiles ( from memory one has 3 flats on it and one has 1 flat on it). I don't know if it makes a difference or not but I suppose they must be there for a reason.
Gary
 

Viking

Insurance co's are crap.
May 19, 2007
2,317
4
Near Richmond, North Yorks
I didn't actually remove them, I just checked that they slid easily in and out (which they did) and that was good enough for me. If there was a problem then I'd have gone further with it though.
 

oldtimer

Active Member
Mar 3, 2008
161
3
Wales
Hi, was the slightly under £70, for one wheel or both rears? How much would it be for all four? Mine is 05 1.9 Altea.
 

RUM4MO

Active Member
Jun 4, 2008
7,812
989
South Scotland
Yes I agree it is always a good idea to buy OEM either from the dealer or an other source as long as they are really same as fitted at factory. I made that mistake with the previous pads I bought for my Passat B5 and the pads did not have anti-squeal pads - and they did sound a lot like a taxi even after frequent cleaning and applying Copper-ease. One point though, these rear piston do really need to be rotated as they are wound in - if this is not done two things happen, firstly the pistons will not retract fully and secondly, the handbrake actuating screw may be left near its end stop so it will not work as intended. Thast is why the piston/handbrake actuator need "zero'd" or reset before fitting new rear pads. Fronts of course don't need this but you can still use the retractor tool with a piece of hard wood to protect the end of the piston - to make retracting them easier.
 

Damoegan

Sir Bob,a geordy legend..
Oct 15, 2007
8,993
3
Newcastle
Nice guid mate :)

Just for refenence, its a 15mm spanner, not a 14mm.

Replaced the rear discs and pads on the Mrs' mk4 gold the other day.
 

techie

Skoda Techie
Mar 22, 2003
5,438
5
Worcs
Every VAG car I have worked on has been 13mm and 15mm for the rear calipers.

Nice guide though, some models with larger rear discs you have to remove the carrier to get the disc out.
 

Muttley

Catch that diesel!
Mar 17, 2006
4,987
31
North Kent
Nice guide. I'm just about to do this on a Toledo II. One thing, though: the pistons most definitely have to rotate as they are pushed back, as the mechanical handbrake mechanism is attached to the piston by a screwed rod, and it self-adjusts by the piston climbing up the screw thread under hydraulic pressure every time you use the footbrake with the handbrake off (i.e. most of the time).
 

leedavis88

Active Member
Mar 6, 2012
23
0
West Mids
Great write up and has certainly given me the confidence to carry the job out myself. I brought some Brembo disks and pads. The pads have self adhesive backing and come with new carrier bolts with locking compound. :D
 

leedavis88

Active Member
Mar 6, 2012
23
0
West Mids
Following this guide I just replaced rear disks and pads on 2005 Altea. Quite an easy job except for winding the caliper piston back (yes I used the Laser windback tool) which seemed to be stuck fast. A bit of frustration later and they went back real easy...

Next job might be the Infinity speaker upgrade but I have a wedding and honeymoon to pay for first!

Thanks to OP for taking the time to share this :rofl:
 
Nimbus hosting - Based solely in the UK.