
You are using an out of date browser. It may not display this or other websites correctly.
You should upgrade or use an alternative browser.
You should upgrade or use an alternative browser.
Kriss
Guest
Not at all mate. I have followed VW Touran DVD installation manual and run 3 cables down to the fuse box. (neg, +12 and ACC). Courtesy light cable connects straight to the light unit.
I will be doing this in the next car as well but I will not bother with running cables down to the fuse box as all of them can be connected to the light unit.
(I ended up joint ACC and +12V together anyway as I wanted kids to watch DVD even with the engine/ignition off)
I will be doing this in the next car as well but I will not bother with running cables down to the fuse box as all of them can be connected to the light unit.
(I ended up joint ACC and +12V together anyway as I wanted kids to watch DVD even with the engine/ignition off)
Kriss
Guest
http://www.alpine.co.uk/fileadmin/user_upload/manuals//car_audio_manuals/RSE-K100TN/IM_RSE-K100TN_EN.pdf
Ignore roof storage removal if you don't have one...
Ignore roof storage removal if you don't have one...
Looks great mate.
I went down the route of two monitors fitted to the rear of the front seat headrests.
I used the NECVOX FD-7569 monitors which fitted perfectly.
I picked up the live and ground feed from the rear console cigarette lighter. Pushed the cable down inside the seat with the aid of a small stiff bar, tape the cable to one end and shoved it down the headrest hole until it came out in the footwell area (I did need to unclip the bottom part of the seat material, re-clipped the upholstery once it came through)
Cut the headrest open to take the monitor shell, this gives the monitor the sunken look, Then shoved the cable up the headrest bar into the cut out area,
Did the same for the video cable which comes from the headunit, I tucked this under the centre console.
Presto, no wires visible
If you want any info scream or I can post up some pics if it helps
But nice work Chris it looks a top job, AND YES it does keep the kids quiet on long trips, I also have a load of movies on SD card which makes switching movies very easy and no messy DVD to store.
Last edited:
Thanks a lot Dai_O!
I was hoping to do the same with a small rod so it's great you confirm that it works.
To unclip the seat material, did you recline the seat all the way back for access?
Am going for those: http://www.eonon.com/Car-Monitors/Headrest/L0261M.html, as I already bought the Head unit from them.
Thanks for the help!
okay so if you are sat on the back seat I think I wound the seat so it would tilt forward as far forwards as it would go, then at the bottom you will find the part where the seat material joins,
it is like two connectors, male and female which goes the complete width of the seat, should just come apart. I will see if I can put some pics up later on, its almost like a gripper bag setup but not quite lol
I like the look of them monitors, mine were smaller 7 inch versions but they fitted on the original headrests and I picked the pair up off ebay for a song, (less than 75quid for the pair, brand new)
just had a look,
Tilt seat all the way forward, now its time to get on the floor or have a feel, at the lowest part of the back piece you will find a plastic strip which runs the width of the seat, this is the connector / joiner, it will come apart. If you cant find it slide your fingers through the seat, ie the gap between the cushion which you sit on and the back piece, the connector is just above this gap on the back.
From memory it was a bit of a pig to get it back together, but that's the bit I undid which gave me full access to the inside of the seat.
I used a thin strong but flexible rod about 3 foot long, threaded it down the headrest hole, then on the top of the rod I tape a some string, pull the rod through the back of the seat, used the string then to pull the wire through
Sorted lol
Tried to take some photos but the sun is out and over exposing everything, will park up in the shade later on and take some
that was worth all the posts ! looks splendid , how is it fixed to the roof , is there a supporting strut handy or is it just screwed to the headlining , how did you get the power upto it
MM
Kriss
Guest
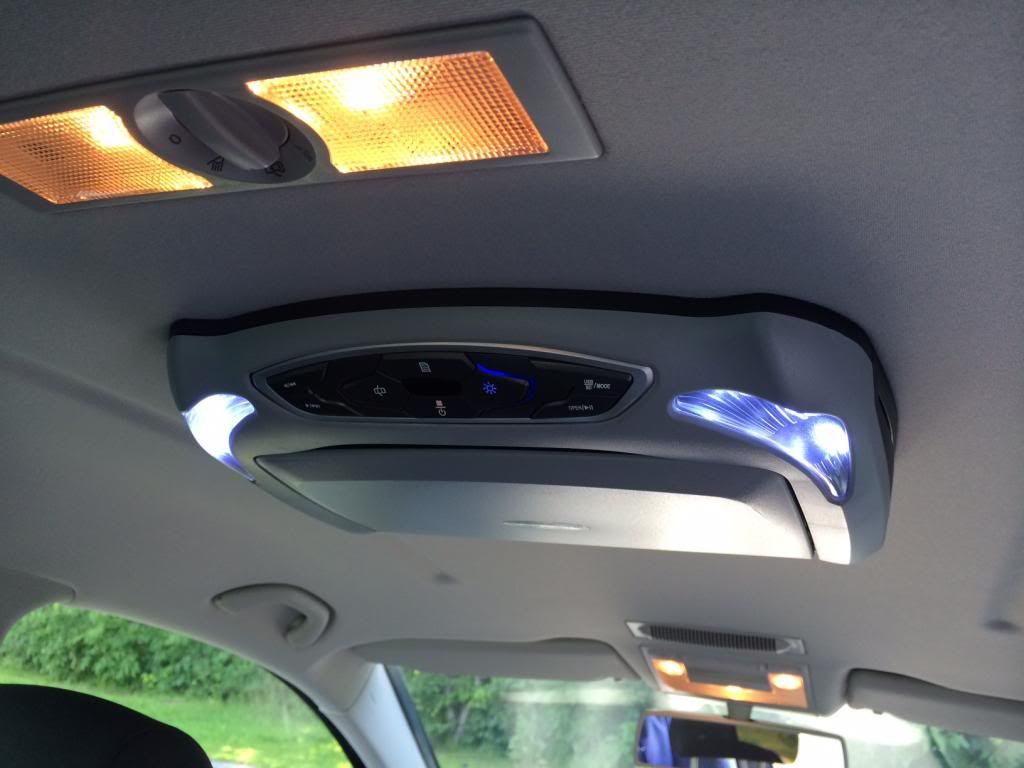
Unit is screwed directly to crossbeam which also has a 2 pre-drilled holes! Combination of both makes my installation very very strong. I would not recommend to hang it on headliner.
As mentioned in my previous post, I have run cables down to the fuse box but next time will connect power to courtesy light unit as LED screens are not consuming lots of power.
Hope this helps
As mentioned in my previous post, I have run cables down to the fuse box but next time will connect power to courtesy light unit as LED screens are not consuming lots of power.
Hope this helps
Kriss
Guest
I have bought this one:
http://www.ebay.co.uk/itm/10-1-HDMI-Car-Roof-Mounted-Flip-Down-HD-Monitor-Overhead-DVD-Player-Game-IR-/190884920642?pt=UK_Audio_TV_Electronics_In_Car_Entertainment_GPS_In_Car_Audio_Players_PP&hash=item2c71a0bd42
Regarding pre drilled holes:
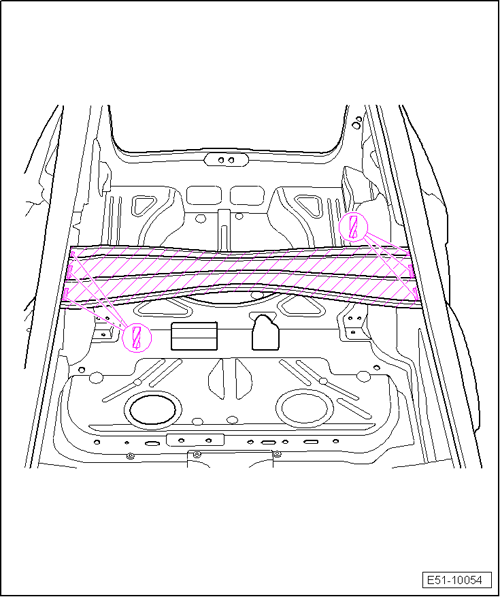
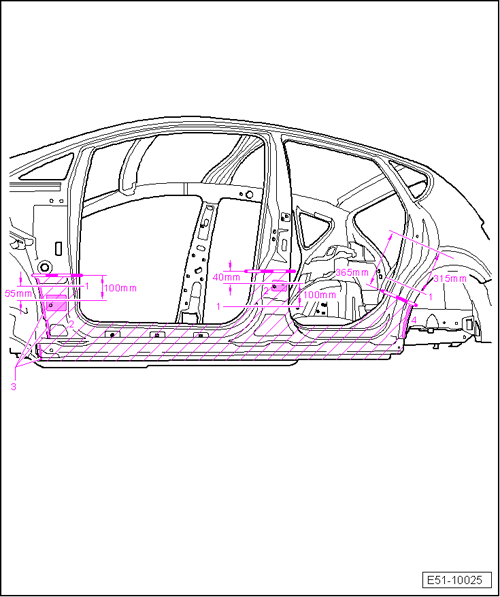
I have cut out a square in the headliner; right in the middle of centre crossbeam and centre pillars. Make sure that the hole is smaller than your DVD as you should fit it over the headliner!!!
See below pictures (ignore pink measurements; they are for something else); they should help to locate crossbeam.
Any questions, just ask")
http://www.ebay.co.uk/itm/10-1-HDMI-Car-Roof-Mounted-Flip-Down-HD-Monitor-Overhead-DVD-Player-Game-IR-/190884920642?pt=UK_Audio_TV_Electronics_In_Car_Entertainment_GPS_In_Car_Audio_Players_PP&hash=item2c71a0bd42
Regarding pre drilled holes:
I have cut out a square in the headliner; right in the middle of centre crossbeam and centre pillars. Make sure that the hole is smaller than your DVD as you should fit it over the headliner!!!
See below pictures (ignore pink measurements; they are for something else); they should help to locate crossbeam.
Any questions, just ask
Kriss
Guest
See my reply from 30-06-2014, 21:48 regarding wiring.
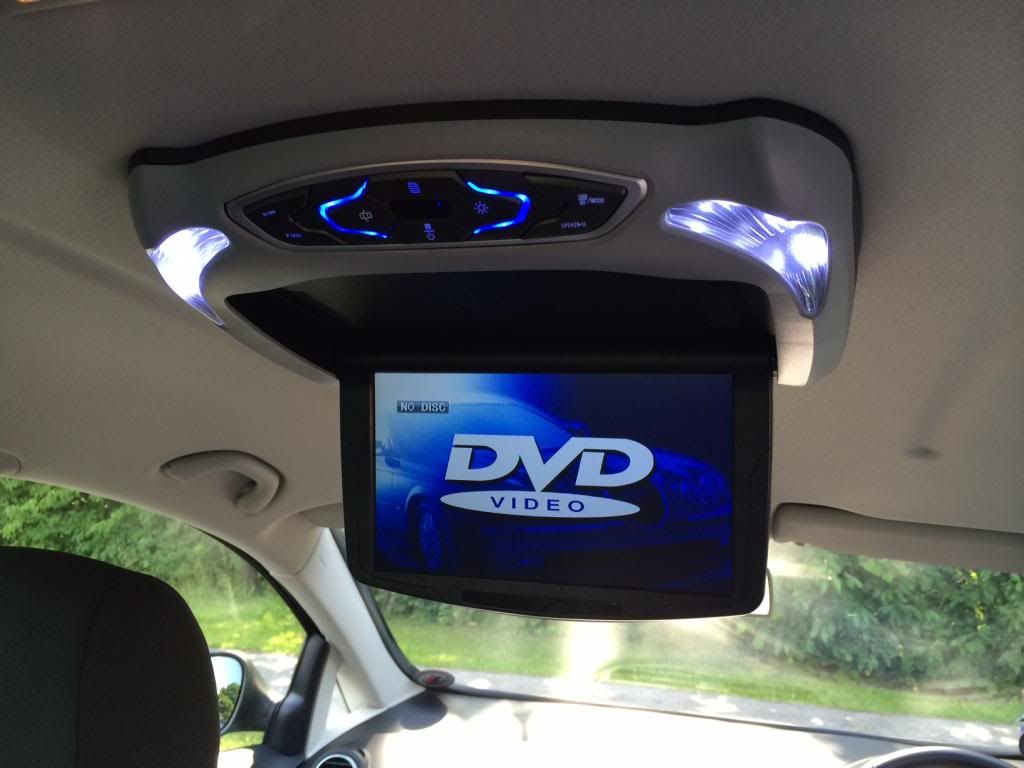
Unit works perfectly; great picture and sound (via wireless IR headphones or FM streaming to the headunit)
Unit works perfectly; great picture and sound (via wireless IR headphones or FM streaming to the headunit)
Pre-drilled holes will be there for the ceiling DVD unit that came as part of the Altea Family Pack option.
Similar threads
- Replies
- 21
- Views
- 3K
