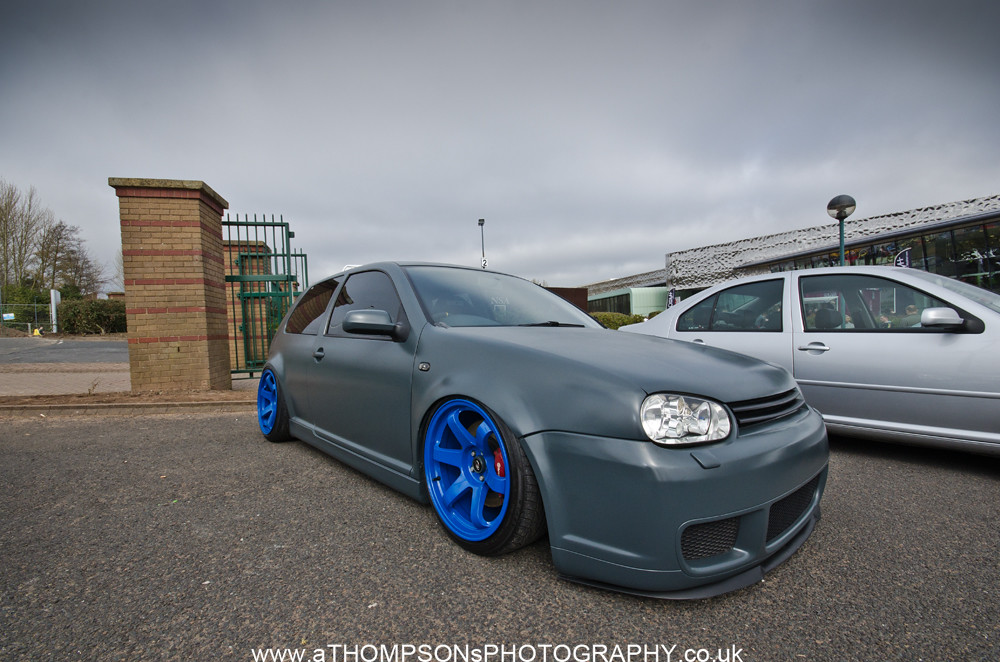
Grahams81-Leon 4wd, Big Turbo - Back in the saddle :-)

grahams81

Active Member
Oct 14, 2010
1,165
6
County Durham
great choice of wheels although gold and matt isnt my colour :/ id see a nice gloss black with a red band but tjats just me. i like the wheels. very original.and motorsport(y) ;) but please stop changing the spec.ans get it.built before your to old to handle the kicl from.that tubby ;) thatll be a back breaker!!

Grahams not having the gold ones, he is having grey as per post 873. :p

Yeh Like Phill says i'm getting the grey ones, but i wasn't concerned about the colour as i'll probably paint them later anyway.
I think that with the car being matt / satin i'm gonna need gloss wheels and maybe little gloss touches like mirrors / roof.

And yeh i've pretty much settled on the spec, just gotta build it now :D
Oh and too old - i'm only 31...[B)]
 
Apr 12, 2008
1,197
1
I know those wheels you have bought have prestige, they will be light and good for track wheels, but are a little bland do you not think. Have you not considered some dirty great wide jap wheels?


IMG_4069_x2sQ_1.jpg

6835430416_c343bcf2c9_b.jpg

5082702154_835cce15b0_b.jpg
 

grahams81

Active Member
Oct 14, 2010
1,165
6
County Durham
I know those wheels you have bought have prestige, they will be light and good for track wheels, but are a little bland do you not think. Have you not considered some dirty great wide jap wheels?

Yeh they are a bit bland, i'm gonna try em on and see. If they look a bit teeny weeny i will just keep them for track days and get some rota's or something like that ;)
 

grahams81

Active Member
Oct 14, 2010
1,165
6
County Durham
Nah not yet, been told by the seller there 17's.

I'll be getting them Thursday / Friday as i'm having them couriered - thought he was in Blackpool from the location in his ad on Ed38 but turned out he was in Essex.
 

grahams81

Active Member
Oct 14, 2010
1,165
6
County Durham
The top strut bushing, is them for the cupra r or a 4wd?

Is them neccesary when putting on coilovers? Are you only using them in front?

:)

The solid top mounts are for all LC / LCR / 4WD basically all mk4 golfs platforms.... they aren't necessary just thought they'd be better for handling :D

And yeh only fronts the rears are totally different, the 4wd cars bolt the shockers into the rear part of the rear wheel arch.
 

grahams81

Active Member
Oct 14, 2010
1,165
6
County Durham
So i managed to get a bit more done on the roll cage.

I left it last weekend with the A-pillar supports all tacked up into position, i started to make a roof cross piece for the front.

As the main hoop is quite low i wanted the front windscreen cross piece a bit higher than just straight across so i cut a pre-bent piece in half and used the bent end pieces to give the cross bar a bit extra height.

All tacked up, into position -

IMG_0365.jpg

IMG_0364.jpg


Next up i made a roof triangle cross piece to run from the joint of the front windscreen brace to the rear main hoop. I used another bend to create an angle to the piece was level.

Tacked into position -

IMG_0366.jpg

IMG_0367.jpg

IMG_0368.jpg

IMG_0369.jpg

IMG_0371.jpg

IMG_0372.jpg


Once i was happy with the alignment of everything i decided to get the MIG welder out and put some decent tacks on to hold it all together.
As i have built the front section from parts and pre-bent parts i had to plan it so i could get full access to weld right round every joint, obviously i couldn't do a half arsed job of welding or the cage could take my life in a accident instead of saving it.

Plan -

1. Weld the roof section up complete.
2. Weld the front sections up complete.
3. Reassemble and check alignment then weld the roof section to the main hoop.
4. Tilt main hoop forward to access top of roof - main hoop joint.
5. Clean off paint from main hoop fixing points and weld feet up.
6. Install front A-pillar sections and weld to roof section.
7. Weld in Box section front feet anchors to chassis.
8. Finish off Door Bars and weld in.

So next job was to remove the roof section to fully weld it up -

IMG_0373.jpg


I used my MIG on the pipe end joints on 150 amps with a good wire speed with 0.8mm wire, got very good penetration :D

I welded up the joints between the pipes with the TIG @ 100 amps with a 2.4mm tungsten, and added plenty of filler rod....again ensuring really good penetration......;)

Once i had finished that i got the flap wheel disc in the angle grinder and dressed the welds level with the pipe so the joint wasn't visible.

IMG_0374.jpg

IMG_0375.jpg


I then decided to reinstall the roof section and check the assembly hadn't pulled when i welded it, it had a smudge but still lined up ok.

I then finalised the position of the front uprights, and again welded them up.

I had only tacked up the mounting points so again busted out the MIG and welded the inside of them. Once finished i welded up all the joints of the front pieces -

IMG_0376.jpg


Hopefully get the front totally finished tomorrow. then onwards with the door bars.
I'm also going to be putting a cross brace between the rear cage points to mount harnesses off.

I'll update again tomorrow.

So long for now..
 

Willie

LCR Track car
Aug 6, 2004
8,939
1
Sunny Scotland
I've spoken to cage builders before and quizzed how they weld the top of the cage. I was told they cut holes in the floor and sink the cage into there ;)
 

suj

Wheel Connoisseur
Jan 1, 2009
5,808
1
Birmingham
Graham who care's if the wheels are bland, they are fit for a purpose IMO, as long as they do that well, lower unsprung mass, then you are onto a winner :)

Good work as usual, keep it up.
 

grahams81

Active Member
Oct 14, 2010
1,165
6
County Durham
I've spoken to cage builders before and quizzed how they weld the top of the cage. I was told they cut holes in the floor and sink the cage into there ;)

Thanks for that Willie, i had always wondered how the hell they managed :)

Graham who care's if the wheels are bland, they are fit for a purpose IMO, as long as they do that well, lower unsprung mass, then you are onto a winner :)

Good work as usual, keep it up.

Thanks Mate, I think they'll look good with the overall theme. It's not going to be a show and shine car - it's being built to drive and like you say if they are lightweight do the job then happy days :thumbup:

Wheels will work well mate. Function over form also!

Good work on the cage too :)

Yeh Cheers Tom, can't wait to get it functioning !!! i feel like i'm finally getting somewhere now.

So i did a couple of hours yesterday before going round a friends house for a party -

I built the cage back up into the car and lined it all up - tacked it all together again to ensure no movement whilst i welded the new roof section to the main B pillar hoop.

I got the MIG out and welded the roof to the hoop and then again removed the front sections and ground off the tacks so i could tilt the cage forward to weld the tops of the joins -

IMG_0377.jpg

IMG_0378.jpg

IMG_0379.jpg


Whilst i had the cage lent forward i cleaned up the rear mounting points which i had previously sealed and painted.

So i bolted the cage back down and rechecked alignment after the welding - everything was cool.... and thats where i finished for the day.

IMG_0381.jpg

IMG_0380.jpg


Todays job - tack the front A-pillars back in and then finish off making the door bars :D

Ta tar and thanks for reading.
 
Last edited:

grahams81

Active Member
Oct 14, 2010
1,165
6
County Durham
Great work Graham, you've got some skills :D

Thanks Mate :cheers:

looks great you have the same grinfer as me :p.
is that mig gasless??

:D It's not a bad grinder, it was cheap and i have abused it loads during the build and it's still going strong :)
The MIG welder is a Gas / Gas-less - it can be used gas less with flux wire but i use it with Argon and normal mild 0.8mm wire for heavy work, 0.6mm for thin metal / bodywork.

Just come in for my dinner so thought i would put a couple of pics up of this mornings work.

Been working on the door bars and i must say I'm quite happy with how there looking.

I wanted them to be stiff and strong but not really get in the way too much to get in and out of the car. As i don't have any seats yet i needed to make sure the bars wouldn't be in the way - killing two birds with one stone by tying in the B-pillars so i can weld to them and stiffen it all up.
Dan was kind enough to post up a couple of pics of his setup (couple of pages back now) to show me where to give clearance for the seats.

Anyhow enough rambling heres the pics -

IMG_0386.jpg

IMG_0385.jpg

IMG_0384.jpg

IMG_0383.jpg

One showing the top angle -
IMG_0388.jpg

IMG_0389.jpg


So just gotta do the other side then start welding them in, really happy it's starting to take shape now :)

I'll update when i've done a bit more GRAFT :)
 

_chris_

Active Member
Jul 6, 2008
349
0
in the car
I've spoken to cage builders before and quizzed how they weld the top of the cage. I was told they cut holes in the floor and sink the cage into there ;)

I've just brought a custom cages cage for my track car and that Is the method they suggest to use.
 

grahams81

Active Member
Oct 14, 2010
1,165
6
County Durham
Just finished for the day, managed to get the passenger side door bar all cut and tacked into place......

IMG_0391.jpg

IMG_0392.jpg

IMG_0393.jpg


So nearly finished the cage now, just got to put a harness bar across and run a couple of bars between the rear mounting feet.... then final weld it all in.

Of to work tonight for the week but when i get back on friday my wheels & engine bits from Integrated Engineering should be here. Still waiting on my SEM inlet manifold from Clay @ CTS Turbo --- only been 4 months now [:@]

Anyhow thanks and so long.
 
Progressive Parts, performance parts and tuning specialists