Grahams81-Leon 4wd, Big Turbo - Back in the saddle :-)

m0rk

sarcasm comes free
Staff member
May 19, 2001
27,787
33
Clanfield, UK
i assume IE have tested the "ribs" down the sides of the intake chamber and there for a reason, to disturb the air flow about each inlet trumpet opening :shrug:

Looks more like access to do the bolts up I think
 
Last edited:

tufftybloke

Badger 5 Edition
Feb 28, 2009
657
0
Gloucestershire, UK
i assume IE have tested the "ribs" down the sides of the intake chamber and there for a reason, to disturb the air flow about each inlet trumpet opening :shrug:

Looks more like access to do the bolts up I think

Nail on the head m0rk... Looks like you bolt through the back plate to the plenum... in flow terms I can't see it being a major head ache especially in context with forced induction...

<tuffty/>
 
Last edited:

grahams81

Active Member
Oct 14, 2010
1,165
6
County Durham
Looks very good Graham.
I :love: the wheels

Thanks Mate :)

Loving the progress graham! still going with white for the inside? :)

Cheers :cheers: and i was originally going to paint it white then i changed my mind and ordered up some matt black aerosols..... after rethinking again i thought it'll look poo in matt black so now i've gone back to the original idea and just ordered up some Ford Diamond White.


To be fair Phil , both you & Tim know exactly why there are delays and the order was not complete as we kept adding bits to it.
I know you mean well but others reading this would think I hold there payment as ransom without shipping parts. We do not transfer funds from our paypal account until orders are 100% completed and shipped.

Graham, SEM manifolds are now in stock.

Thanks for the update Issam -- apparently they are due with Clay any day now.

Integrated Engineering have just brought out a new inlet manifold...
Looks quite good and can be swapped to be fed from the drivers side which may suit you and your turbo position better...

Loving your work on this... most people would have just bought an S3 or something but fair play to you dude... love the engineering gone into this :D

<tuffty/>

Thanks Tufty - i have been admiring these since they were announced - i tried to cancel my order of the Largeport SEM manifold but Clay didn't want to be stuck with it..... so i'm gonna have to stick with it for now.
My SEM should be getting shipped in the next couple of days, may sell it later on but for now i'll run with it.

Good shout Paul ;)

Graham have to really commend you on this project the quality of work and the effort you have gone to is phenomenal and I'm sure this car will destroy 99.99% of the cars you ever put it up against

I've been following this thread closely for a long time and will do for ever more :)

Thanks Mate, cheers for your kind words :)

-------------Smallish Update -------------

I haven't updated the thread in a while, i have been doing odds & sods of welding / fab work lately.
I rubbed the roll cage down and stuck some primer on in preparation for painting.

IMG_0465-2.jpg


I've just ordered some Ford Diamond White Synthetic paint to paint inside the car - it doesn't need lacquering so will be nice and easy to paint.

I fitted welded some plates in under the dash today to tie the roll cage and cross dash bar to the bulkhead (didn'tt take any pics sorry). I also fitted the A-Pillar Gussets today really happy think they look good.... Got another set coming to do the inside of them -

IMG_0467.jpg

IMG_0468.jpg


Just got to weld in some gussets onto the B pillars to the door bars now.

I also fitted the front wheels and dropped the wings back on.

Gonna hopefully get the B pillar gussets fitted tomorrow and start removing sound deadening :D

Thanks for all the comments :thumbup:
 

grahams81

Active Member
Oct 14, 2010
1,165
6
County Durham
Well i've been busy in the garage today.

I started off by welding in some plates to tie the door bars to the B-Pillars -

IMG_0473.jpg


I also welded up the hole in the roof which some idiot had drilled in to mount the hands free aerial.

So thats it on the fabrication side of things for now.

Started the mammoth task of removing the sound deadening, of this i used a scraper and a blow lamp to heat it up... feeling quite happy i then removed the cross piece that forms the front seat mount by drilling out the spot welds -

IMG_0474.jpg


Used a bit of panel wipe to clean the glue / remains off -

IMG_0475.jpg


I then thought i would remove the standard rear seat runners as i'll be using Bucket Seats with side mounts....... well i wish i hadn't bothered - the material is about 3mm thick and drilling out the spot welds took a life time - drilling and grinding for about 2 hours and the inside one still isn't out :censored:
 

joehirth

Rate me up baby
Apr 19, 2010
1,896
3
Woking, Surrey
www.facebook.com
Started the mammoth task of removing the sound deadening, of this i used a scraper and a blow lamp to heat it up... feeling quite happy i then removed the cross piece that forms the front seat mount by drilling out the spot welds -

IMG_0474.jpg


Used a bit of panel wipe to clean the glue / remains off -

IMG_0475.jpg


I then thought i would remove the standard rear seat runners as i'll be using Bucket Seats with side mounts....... well i wish i hadn't bothered - the material is about 3mm thick and drilling out the spot welds took a life time - drilling and grinding for about 2 hours and the inside one still isn't out :censored:

Painful job isn't it!! Weld in bars looks and feels so much more secure though. Looking good.
 

grahams81

Active Member
Oct 14, 2010
1,165
6
County Durham
Painful job isn't it!! Weld in bars looks and feels so much more secure though. Looking good.

Your not wrong Joe, it was nightmare.....

Well i thought the stuff in the footwells was had to get out but it was a piece of p*ss compared to the stuff in the back of the S3 section (not sure if it absorbed water from sitting outside for 6 months but it was a nightmare / pretty much had to burn it and scrape it off in crumbs :cry: )

But i got there in the end -

IMG_0476.jpg


IMG_0479.jpg


Next up i finished removing the drivers side inner seat mount :censored: finished off with 3 holes in the shell..... need to weld them up but worried about the sealer underneath catching fire and me not being able to get to it to put it out :confused:

Then i thought i would remove the rear seat mounts from the S3 part as i'm never gonna need them :D

Offending items -

IMG_0478.jpg


Drivers side part nearly off -

IMG_0477.jpg


I'm getting there slowly but surely......

Edit - Apparently synthetic paint is **** as it can't be cut back...... Matt it is then.
 
Last edited:

ernie-mogs

Guest
Mate, you are a HERO. If Carlsburg built car's they'd get you to build them.
Spent my Sunday afternoon reading this post from start to finish. Looking foward to seeing vids of this beast.

And all done on your drive way. AMAZING

and you took the time to write it up too, I feel as if I've known you for years.

Well done that man!!!!!!!!:clap: :clap: :clap: :clap:
 

Phillc

Love is....Yellow
Apr 23, 2007
4,170
20
Pershore, worcestershire
To be fair Phil , both you & Tim know exactly why there are delays and the order was not complete as we kept adding bits to it.
I know you mean well but others reading this would think I hold there payment as ransom without shipping parts. We do not transfer funds from our paypal account until orders are 100% completed and shipped.

Graham, SEM manifolds are now in stock.

TBH Sam it was a long time, and i didn't add anything to my order, other than the riffle drilling and the items to compensate for the cracked exhaust mani. The offer of a Sem slowed/confused things though. I am very happy with the quality of the items you sent but as i said , disappointed about the time taken to send.

(Sorry for the slight hijack Graham)
 
Last edited:

ShizTheBiz

Active Member
Oct 25, 2010
192
0
Grimsby/Cleethorpes
excellent work. sound proofing is a pain in the arse!!
having reread this thread there is only one flaw i can find....the gearbox needs a good clean!!! apart from that as everyone else has said a million times...excellent stuff!
 
Last edited:

MI 55UTH

Guest
Just read this from the start, what a truly awesome project! A true example of excellent engineering and a real life dream for any modifier! Hope it all goes to plan because this leon will become ****ography to all of us leon fans!!

Matt black would give it a mean look, which would look awesome, but I personally would love to see it finished in gloss black purely because when polished and buffed up it would look stunning!!! Looking forward to any updates, good luck with the rest of the build :)
 

grahams81

Active Member
Oct 14, 2010
1,165
6
County Durham
Mate, you are a HERO. If Carlsburg built car's they'd get you to build them.
Spent my Sunday afternoon reading this post from start to finish. Looking foward to seeing vids of this beast.

And all done on your drive way. AMAZING

and you took the time to write it up too, I feel as if I've known you for years.

Well done that man!!!!!!!!:clap: :clap: :clap: :clap:

Thanks Mate, really appreciate the comments :cheers: - glad you enjoyed the read, you must have been bored to read all this :D


excellent work. sound proofing is a pain in the arse!!
having reread this thread there is only one flaw i can find....the gearbox needs a good clean!!! apart from that as everyone else has said a million times...excellent stuff!

Thanks Bud, yeh it was a serious pain in the arse, still got the passenger side to do this weekend when i get home. Oh and the gearbox is coming back out soon, i'm gonna strip it and check the insides are ok, i'll also remove the weak rivets from the selectors..... and maybe give it a paint ;)

Just read this from the start, what a truly awesome project! A true example of excellent engineering and a real life dream for any modifier! Hope it all goes to plan because this leon will become ****ography to all of us leon fans!!

Matt black would give it a mean look, which would look awesome, but I personally would love to see it finished in gloss black purely because when polished and buffed up it would look stunning!!! Looking forward to any updates, good luck with the rest of the build :)

Cheers for the Kind words :thanks:

I'm glad so many people are enjoying the build, i know it's slow going at the moment but it'll get exciting once the paints done :)

I thought before i paint the inside i better finalise the seat mounts as i'm planning on running side mounts, i also want to check the roll cage is high enough not to get in the way or be too close to my head..............so i've just ordered a Seat.

EVO%20III%202012%20GRP%20NRl.jpg


The reasons behind buying this seat is basically down to me being a fatty :D 
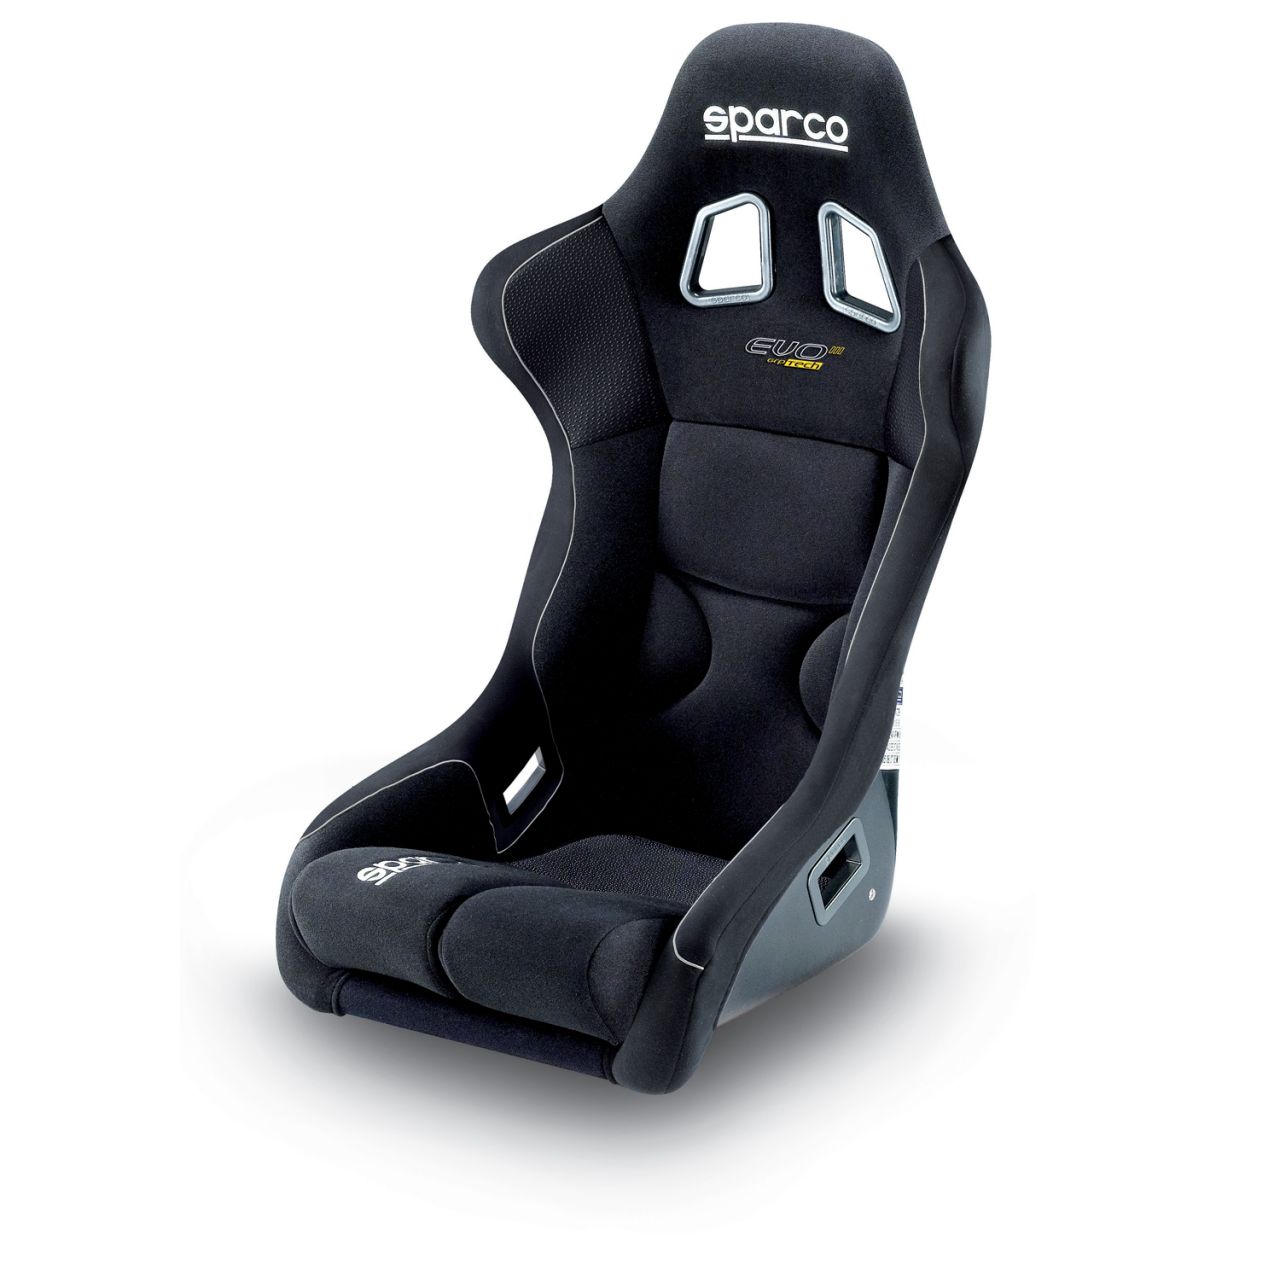
it's for guys with a waist 38-44 so happy days :D

The EVO III is for the "larger gent" i'm slightly worried that it won't fit but hopefully it'll be fine and not foul on the cage.
I will get another seat eventually when funds allow but this will let me move the project along a bit.

I'll update again when it comes with some more piccys
 

joehirth

Rate me up baby
Apr 19, 2010
1,896
3
Woking, Surrey
www.facebook.com
The sealant under the car does catch fiire when you weld it ;).

Get an assisstant (in my case, it was me) and have them squirt water from a trigger bottle onto the weld area, from under the car, to keep the fire down.

Works well. You'll want to do it when you weld in the seat bars too.

Also regarding the seat I have an XL and a standard sized bucket seat, I'm a 30" waste because I'm a runt and the standard seat does not let me move at all, never mind when you do up the 6 points.

The XL is good for my mates with a larger waste. As for height the bars that Alex welded in for my seats are pretty much on the floor, you can just get your fingers underneath them. Basically enough room for the a battery relocation cable to squeeze underneath or similar.
 
Last edited:

VT86

Leon 1.8 "CupraR" 4x4
Mar 22, 2012
325
68
Helsinki, Finland
The EVO III is for the "larger gent" i'm slightly worried that it won't fit but hopefully it'll be fine and not foul on the cage.
I will get another seat eventually when funds allow but this will let me move the project along a bit.

I'll update again when it comes with some more piccys

Evo III outside measures are quite small. It fit almost everywhere, unlike Ergo. I hope that you are not very tall guy coz Evo III back rest is quite short (compared to evo II which is with tall back rest). (I work in company which sell Sparco etc. here in Finland)


Outside dimensions for Evo III

Max width 645mm (sorry about mm measurements) (at height point 600mm)
Max Height 875mm
Bottom width: min 440mm, max 570mm

Those are aprox. measurements by Sparco.


Cheers
 

grahams81

Active Member
Oct 14, 2010
1,165
6
County Durham
The sealant under the car does catch fiire when you weld it ;).

Get an assisstant (in my case, it was me) and have them squirt water from a trigger bottle onto the weld area, from under the car, to keep the fire down.

Works well. You'll want to do it when you weld in the seat bars too.

Also regarding the seat I have an XL and a standard sized bucket seat, I'm a 30" waste because I'm a runt and the standard seat does not let me move at all, never mind when you do up the 6 points.

The XL is good for my mates with a larger waste. As for height the bars that Alex welded in for my seats are pretty much on the floor, you can just get your fingers underneath them. Basically enough room for the a battery relocation cable to squeeze underneath or similar.

Yeh i've had plenty of fires so far :) every time you threaten the car with the welder either seam sealer or the protection wax stuff lights up !!

I've been looking at your thread to see the bars Alex welded in - really nice job. I'm not sure if i'll use tubing or smallish box section. I'll wait and see.

What harnesses did you go for Joe ???

Evo III outside measures are quite small. It fit almost everywhere, unlike Ergo. I hope that you are not very tall guy coz Evo III back rest is quite short (compared to evo II which is with tall back rest). (I work in company which sell Sparco etc. here in Finland)


Outside dimensions for Evo III

Max width 645mm (sorry about mm measurements) (at height point 600mm)
Max Height 875mm
Bottom width: min 440mm, max 570mm

Those are aprox. measurements by Sparco.


Cheers

Thats nice to hear they aren't to big on the outside of the seat - and no i'm not that tall, bit short in the saddle really.

Thanks very much for the dimensions - i did see them on there website but i thought they were wrong as they are smaller than the Evo II.

Should fit like a glove :D

Cheers Again Mate :thumbup:
 

grahams81

Active Member
Oct 14, 2010
1,165
6
County Durham
Little Boring update -

I spent a couple of hours in the garage today, i started welding up the holes that i made removing the driver side rear seat mount, i just set the TIG on low and built it up until the hole was covered then upped the current and smoothed it out.

Before - Swiss Cheese....

IMG_0485.jpg


After - Mouldy cheese.....

IMG_0486.jpg


Attacked with the flap wheel -

IMG_0487.jpg


I had to use a ball pien hammer to smooth the dents out - i then give it a skim with some filler.

I also welded up the holes in the tunnel where i f*cked up removing the original seat mounts.

I then decided to get cracking on the the passenger side - removed all the tar sound deadening.... there was a surprising amount of sound deadening when you add it all up, enough to fill this rather large box, i would say about 5kg in total.

IMG_0508.jpg


So removed the original front seat mount -

IMG_0510.jpg


Just got to remove the seat sliders next and then paint it all white :D

Ta tar for now.
 

grahams81

Active Member
Oct 14, 2010
1,165
6
County Durham
top build buddy

Thanks Mate :)

any updates?? its been a while

Not really, i've been spending an age painting the inside of the car white.
Getting fed-up of the project now :cry:

After i have painted it all white you can see all the joins in the roll cage and it looks shite.
I did a bit more research on the safety of the roll cage (m0rk & Prawn commented on this previously) made with joins in them and it's not recommended.

So i need to make some serious decisions on what to do with the car now :(

I have got some thoughts -

Cut the cage out and run an interior - need to manufacture rear seat mounts / brackets for interior trim.... loads more work and bits to buy like head liner, interior plastics etc etc...

Maybe use the parts from the front part of the roll cage i've made to have a proper roll cage made.....£££

Cut my losses and scrap the car but keep all running gear / engine / loom / ecu / FMIC / wheels etc etc then -

Buy a Golf 4 motion £1500 - £2000 and install my engine / turbo etc...

Or

There's a Audi TT 225 Quattro on ebay for about £1000 - £1500.... easy conversion just drop my motor in and do the turbo conversion...... but it's not a leon :(

AAAAARRRRRRRGGGGHHHHHHH Wish i'd never started this car :cry::cry::cry::cry::cry::cry::cry::cry::cry::cry::cry:

Feeling really disheartened with the car now, i just wan't to get to the stage of the turbo mounting / tabbing the exhaust up.
 
Last edited:
Chris Knott Insurance - Competitive quotes for forum members